Node-RED Set up and Configuration
Lab Objectives
In this lab you will set up Node-RED.
You will learn:
- Node-RED Visual Programming
- How to install additional Node-RED nodes
- How to import a prebuilt flow from GitHub.
Introduction
Node-RED is an open-source Node.js application that provides a visual programming editor that makes it easy to wire together flows.
Step 1 - Install Node-RED
You can install Node-RED on your laptop or on a cloud-based virtual machine, for instance hosted on your Microsoft Azure Cloud.
When you start Node-RED:
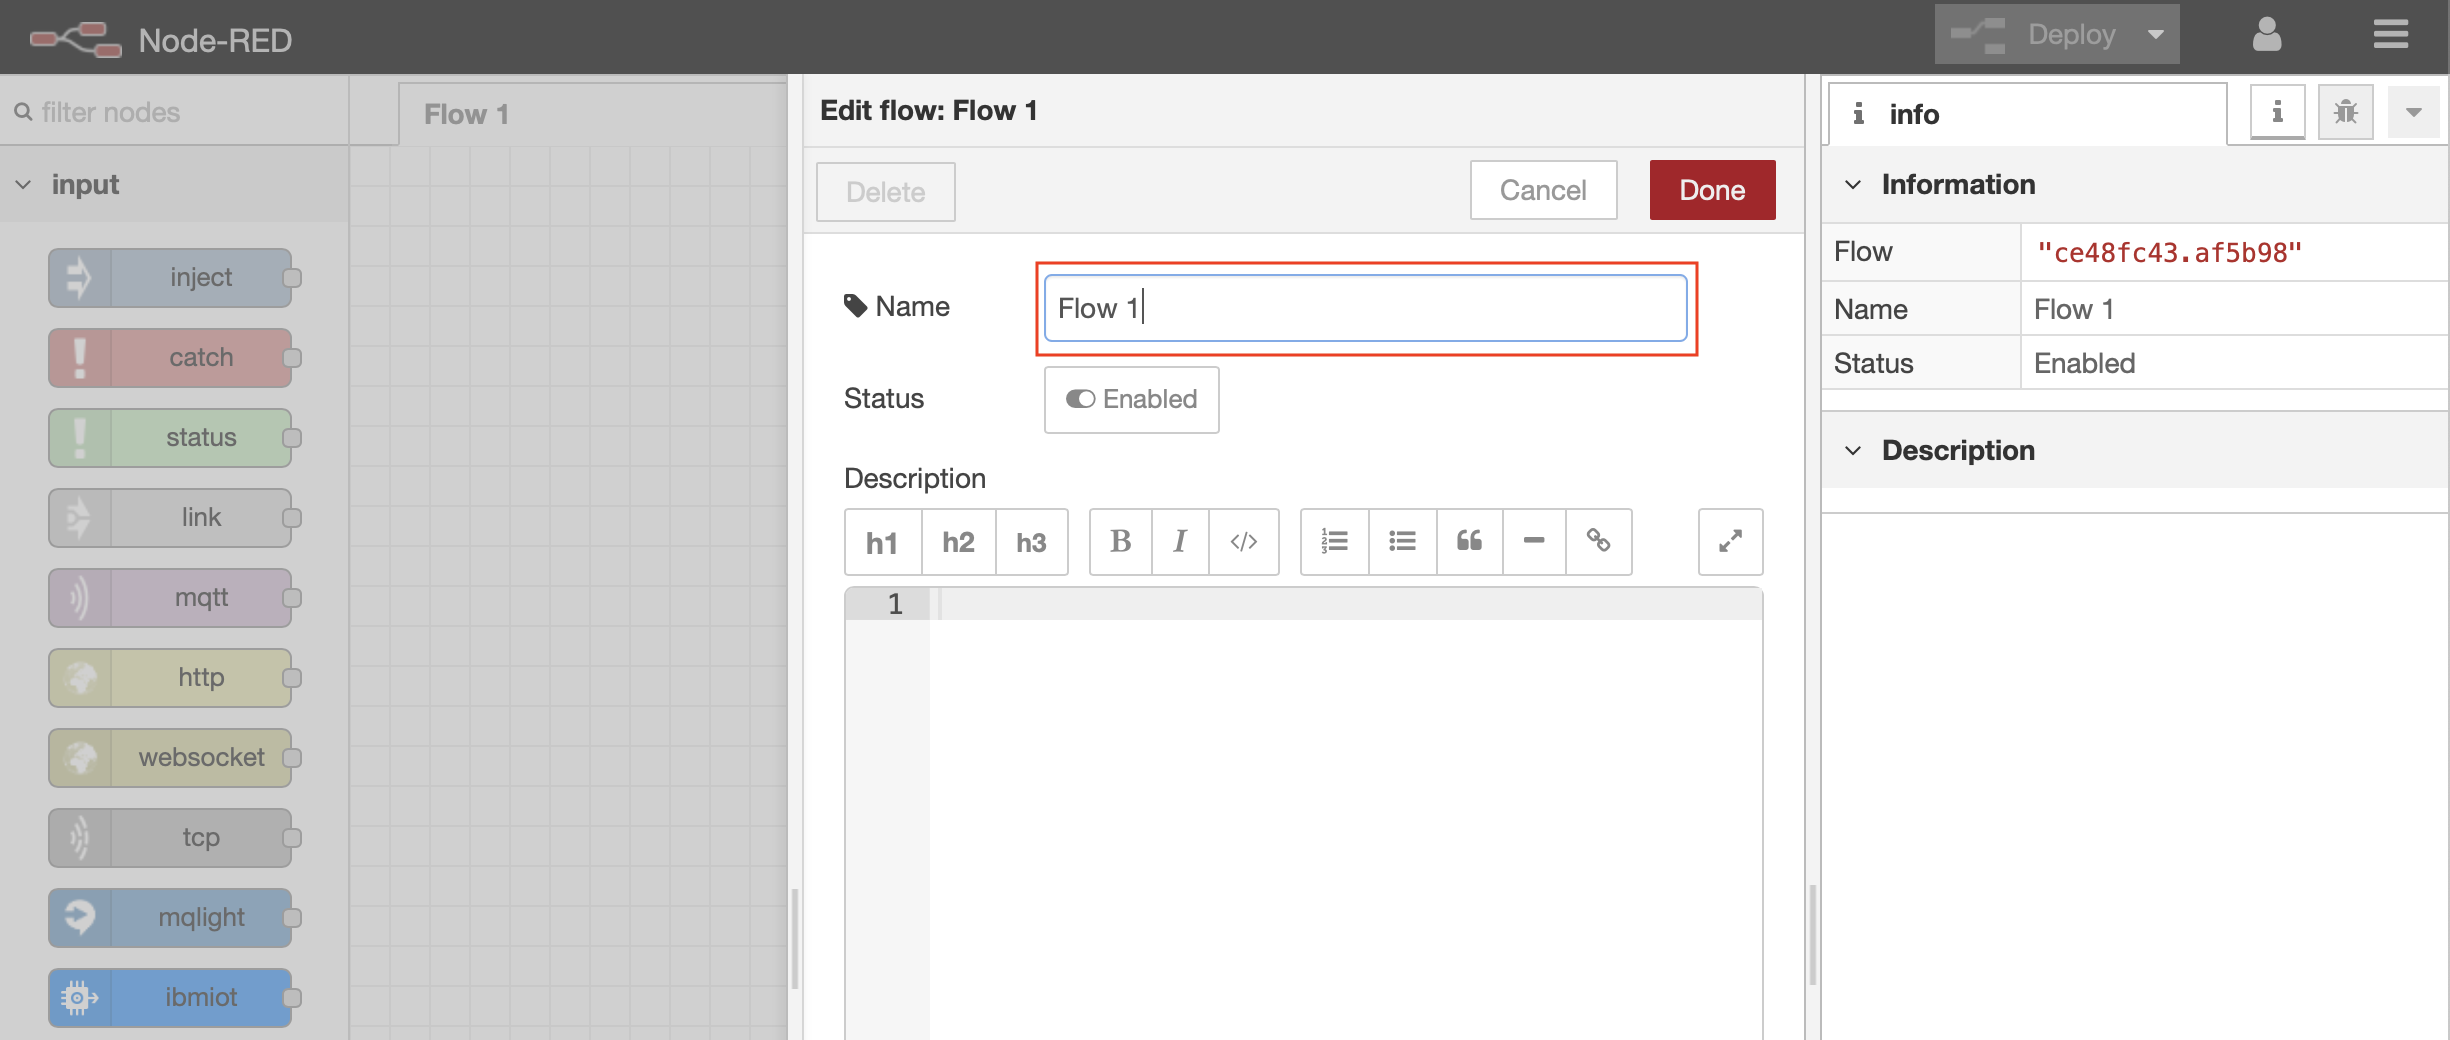
- The Node-RED Visual Programming Editor will open with a default flow
- On the left side is a palette of nodes that you can drag onto the flow
- You can wire nodes together to create a program
- Double Click on the Flow 1 tab header
- Rename this tab from Flow 1 to Receive ESP8266 Data

Step 2 - How to secure your Node-RED Editor
Further steps may be required to secure the editor post installation. Node-RED’s basic Azure installation guide at https://nodered.org/docs/getting-started/azure, for example, deploys with a well know administration password and uses http, which transmits content (including passwords) in clear text. Even for non-production, this is undesirable. Consider the potential impacts from malicious, automated port scanning services seeking servers with default passwords.
Node-Red provide instructions at https://nodered.org/docs/user-guide/runtime/securing-node-red that include:
- Enabling https
- Changing the default password
Consider changing the default user id also.
In this instance, browser warnings about trusting the generated certificates for this development environment can safely be ignored (we trust ourselves). The browser is correctly warning that even though the connection is encrypted against eavesdropping and tampering, it has no way of trusting the certificate and thus the server operators. For larger developments or production systems, this can be resolved using a certificate authority.

These are basic precautions for non-critical development environments. For production environments, further impact assessment and security hardening should be considered.
Step 3 - How to Install Additional Node-RED Nodes (Information Only)
- Your instance of Node-RED may includes just a small subset of Node-RED nodes. The Node-RED palette can be extended with over one thousand additional nodes for different devices and functionality. These NPM nodes can be browsed at http://flows.nodered.org.
Most Node-Red instances will allow you to add or remove nodes from the tools menu, just look at the documentation available for your installation. You will be able to search available nodes, by category, and you will be able to install the ones you want, simply by selecting them.
Step 4 - How to Import a Prebuilt Flow from GitHub
In this step, you will learn how to Import a prebuilt flow from GitHub
- Since configuring Node-RED nodes and wiring them together requires many steps to document in screenshots, there is an easier way to build a flow by importing a prebuilt flow into your IoT Starter Application.
- Not here in Step 4, but in several sections below, there will be a Get the Code link.
- When instructed in those later sections, open the Get the Code github URL, mark or Ctrl-A to select all of the text, and copy the text for the flow to your Clipboard.
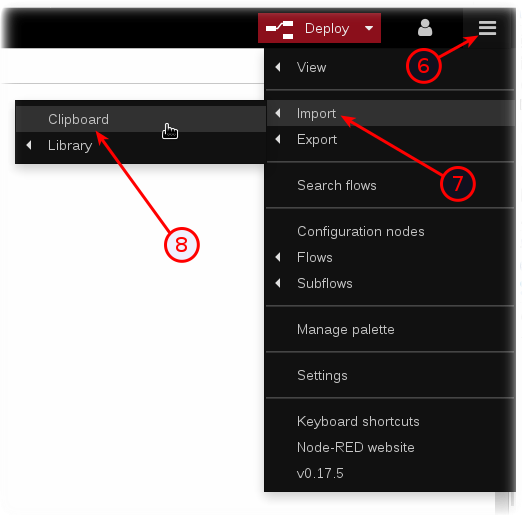
- Click on the Node-RED Menu (6), then Import (7), then Clipboard (8).

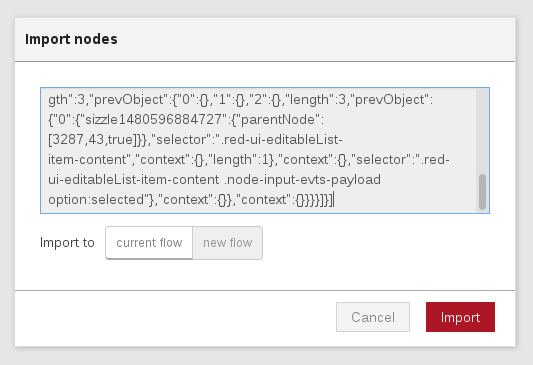
- Paste the text of the flow into the Import nodes dialog and press the red Import button.

- The new flow will be imported into a new tab in the Node-RED Editor.
- Click the Deploy button on the top of menu bar to deploy the Node-RED flow.